
Creating a Folder and Rule in Outlook to Automatically Move Emails

Feb 13, 2025
 2596
2596
SOP: Creating a Folder and Rule in Outlook to Automatically Move Emails
Purpose:
This SOP provides step-by-step instructions to create a folder in Outlook and set up a rule to automatically move emails to a specific folder.
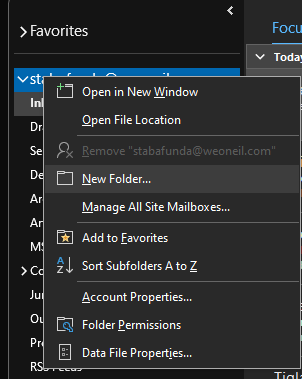
Step 1: Create a New Folder in Outlook
- Open Outlook (Desktop or Web).
- In the left-hand navigation pane, right-click on Inbox (or any preferred location).
- Select New Folder.
- Enter a folder name (e.g., "Important Emails", "Invoices", "Project X").
- Press Enter to save the folder.
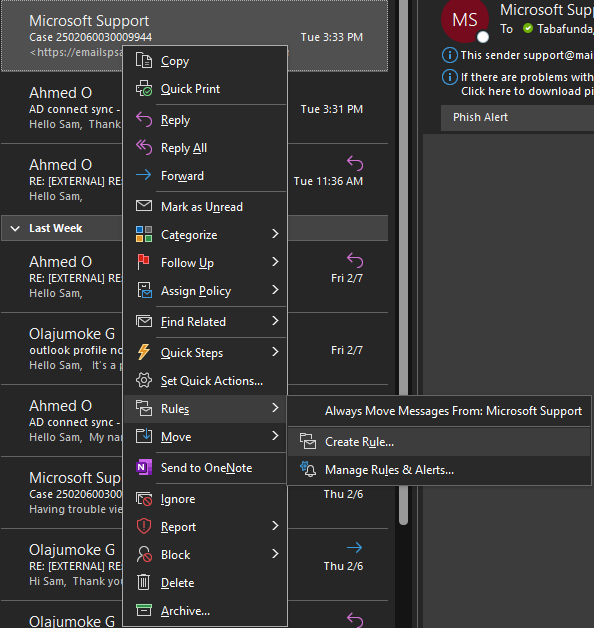
Step 2: Create a Rule to Automatically Move Emails
In Outlook (Desktop App):
-
Right-click on an email you want to filter and select Rules.
-
Click Create Rule.
-
Select the condition(s) that match the emails you want to filter, such as:
- From: Emails from a specific sender or domain.
- Subject Contains: Emails with specific keywords in the subject line.
- Sent To: Emails sent to a specific recipient (yourself or a group).
-
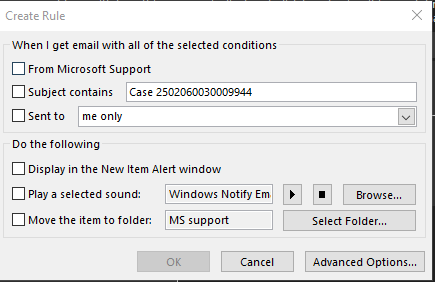
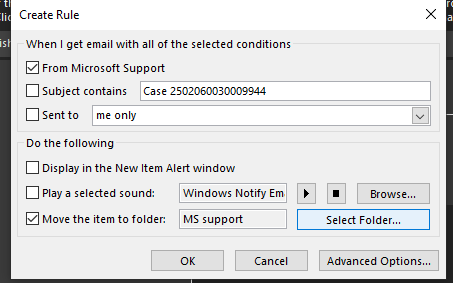
Under "Do the following", choose an action:
- Display in the New Item Alert window – Shows a pop-up alert when a matching email arrives.
- Play a selected sound – Plays a notification sound (default: "Windows Notify Email") or a custom sound.
- Move the item to folder – Moves the email to a specified folder (e.g., "MS Support").
-
Additional Options:
- Check the corresponding box to enable an action.
- Click Select Folder… to choose the destination folder.
- Click Advanced Options… for more customization.
- Click OK to save and apply the rule.
Step 3: Verify the Rule
- Send or receive a test email that matches the rule’s conditions.
- Confirm that the email is moved to the correct folder.
- If needed, modify the rule in Rules & Alerts (Desktop) or Mail Rules (Web).
Additional Notes:
- Rules run automatically when new emails arrive.
- If emails are not moving, ensure there are no conflicting rules.
- To apply the rule to existing emails, manually run it from Rules & Alerts.

