
Enabling the "From" Field in Outlook

May 28, 2025
 348
348
Verify Send As / Send on Behalf Permissions
Before enabling the "From" field, ensure the user has the correct permissions:
- Send As – Allows the user to send emails as the mailbox owner.
- Send on Behalf – Allows the user to send emails on behalf of another mailbox.
If permissions are not granted, follow the "Assigning Delegation on Admin Exchange" https://coreservices.happyfox.com/staff/kb/articles/47 to configure them.
Enable the "From" Field in Outlook (Desktop App)
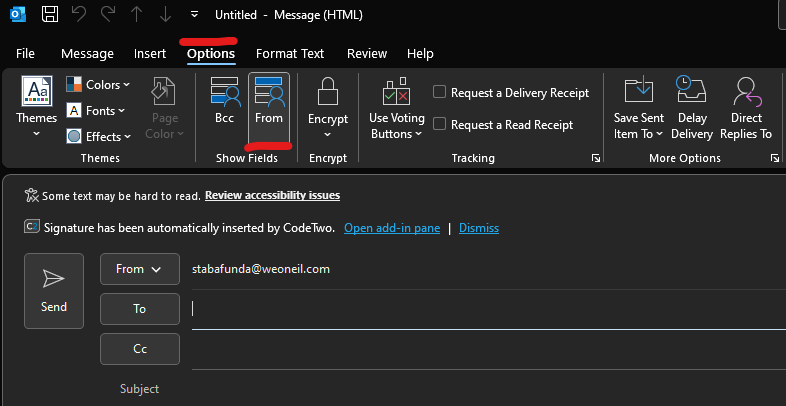
- Open Microsoft Outlook.
- Click on New Email.
- In the new email window:
- Click Options (on the ribbon).
- Click From (this enables the "From" field).
- The From field will now be visible in all new email messages.
Select an Alternate "From" Address
- Click on From in the new email.
- If the desired email address is not listed:
- Click Other Email Address…

- In the Send From Other Email Address window, enter the email address.
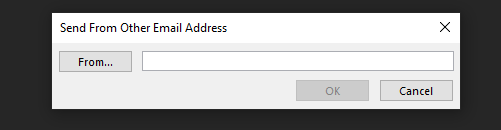
- Click OK.
- Compose the email and send it.

