
Create Digital Signature Bluebeam

Jul 09, 2025
 627
627
Step 1: Open Bluebeam Revu
- Launch Bluebeam Revu 20 or 21 on your computer.
- Open the PDF document where you want to place the digital signature.
Step 2: Access the Signature Panel
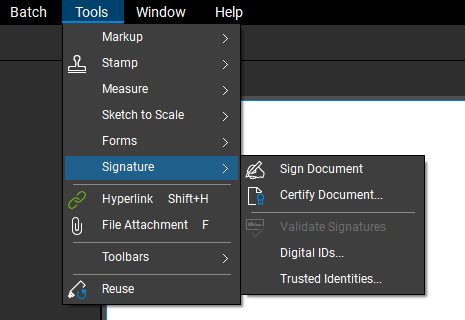
- Go to the Tools menu in the top toolbar.
- Select Signatures > Sign Document.
Step 3: Create Digital ID File
Fill in the required details and create a password
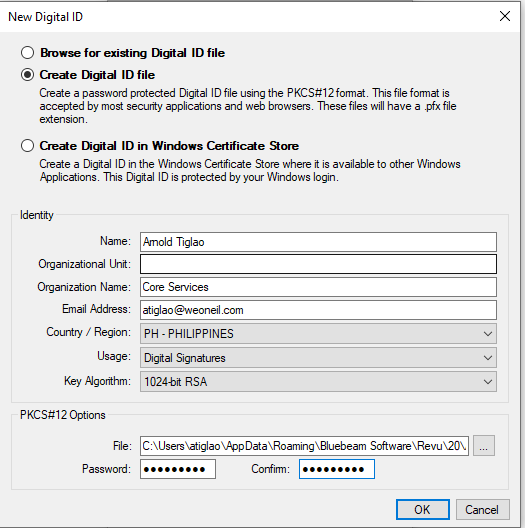
for the appearance settings
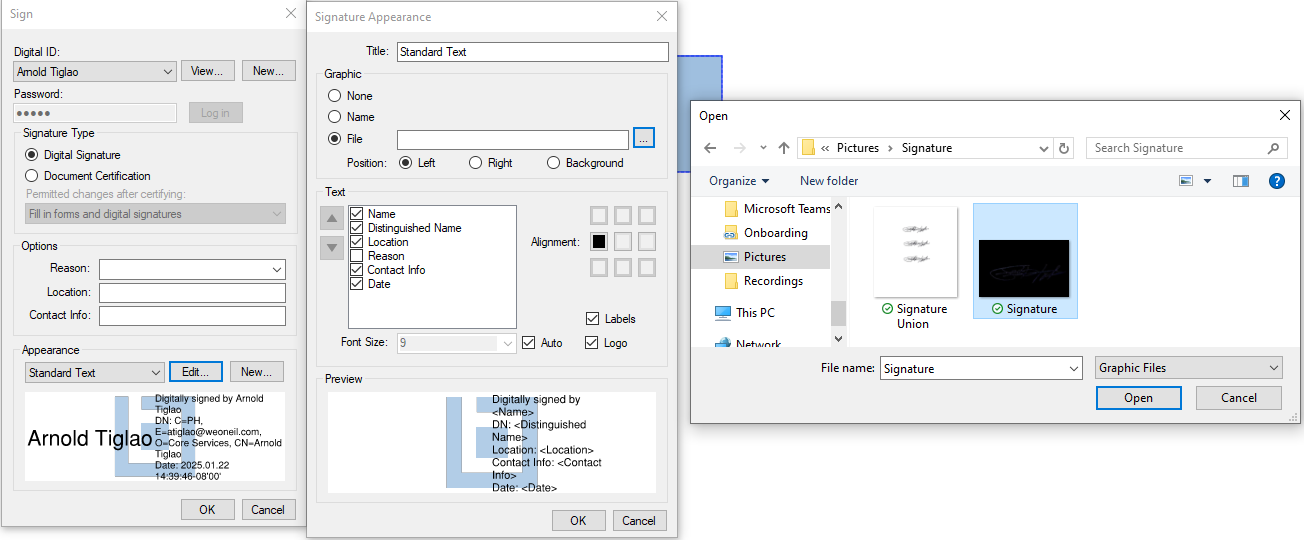
- Click the Edit button and select the File option to upload your PNG/JPEG signature.
- Browse to the folder where your signature file is stored, select the file, and click Open.
- Click the OK button to save your signature.
Step 4: Define the Signature Field
- Click and drag your cursor over the area of the PDF where you want to place the signature.
- A signature field will appear, and the Sign Document dialog box will open.
Step 5: Apply the Digital Signature
- Select your digital ID from the Digital ID dropdown menu.
- Enter your password to authenticate the ID.
- Customize the signature appearance:
- Click Appearance Options to adjust the style, add an image, or configure the displayed text.
- Optional: Add a reason for signing in the Reason field.
- Click OK to place the digital signature.

Step 6: Finalize the Signature
- Save the PDF after placing the signature. Bluebeam will prompt you to save the file as a new version or overwrite the original.
- Once saved, the document will be locked and cannot be edited without invalidating the signature.

